In the previous post, I introduced how to create the manifest.json from installing the Visual Studio Code to required key for the manifest file.
I’m following the instructions below.
Tutorial part 1: Display an image in a pop-up
Previous post: How to Create manifest.json for Edge Extensions
In this post, I will introduce how to create and install the Edge extension.
1. Download the icon image files and save
- Go to the GitHub and download these four files. You can click on the “download raw file” icon on the top right side of the image section.
nasapod128x128.png
nasapod16x16.png
nasapod32x32.png
nasapod48x48.png - Save those files to your project/icons directory. The folder structure is like below according to the Tutorial part 1.
└── ProjectFolder
    ├── manifest.json
    └── icons
        ├── nasapod16x16.png
        ├── nasapod32x32.png
        ├── nasapod48x48.png
        └── nasapod128x128.png
Why I need four images?
Using just one size will be okay. But specifying multiple sizes is recommended for better appearance and compatibility. The web browser selects the most suitable icon size based on the device and display resolution (e.g., high-DPI monitors).
2. Create a HTML file
Let’s create a HTML file to be displayed as a popup dialog when you click the icon.
The HTML file consists of two parts “Head” and “Body”. The “Body” has an image that will be shown in the popup dialog.
<html lang="en">
    <head>
        <meta charset="UTF-8" />
        <title>NASA picture of the day</title>
    </head>
    <body>
        <div>
            <img src="/images/stars.jpeg" alt="NASA picture of the day: Stars" />
        </div>
    </body>
</html>
Save the HTML file as “popup.html” to your project/popup folder. The folder structure is like below.
└── ProjectFolder
    ├── manifest.json
    └── icons
        ├── nasapod16x16.png
        ├── nasapod32x32.png
        ├── nasapod48x48.png
        └── nasapod128x128.png
    ├── popup
        └── popup.html
3. Add the Image file
To show the image in the dialog, add the image file “stars.jpeg" in the directory path you defined in the “src” in <img> tag in popup.html.
Download the image from the link below, click on “Download raw file” button to download.
Save it into the images folder.
└── ProjectFolder
    ├── manifest.json
    └── icons
        ├── nasapod16x16.png
        ├── nasapod32x32.png
        ├── nasapod48x48.png
        └── nasapod128x128.png
    ├── popup
        └── popup.html
    ├── images
        └── stars.jpeg
4. Edit the manifest.json file
Open the manifest.json file, add the “icons” and “action” keys, as follows:
{
    "name": "Image Pop up",
    "version": "0.0.0.1",
    "manifest_version": 3,
    "description": "Displays an image in a pop-up.",
    "icons": {
        "16": "icons/nasapod16x16.png",
        "32": "icons/nasapod32x32.png",
        "48": "icons/nasapod48x48.png",
        "128": "icons/nasapod128x128.png"
    },
    "action": {
        "default_popup": "popup/popup.html"
    }
}
That’s all you need to prepare for launching the Edge extension!!
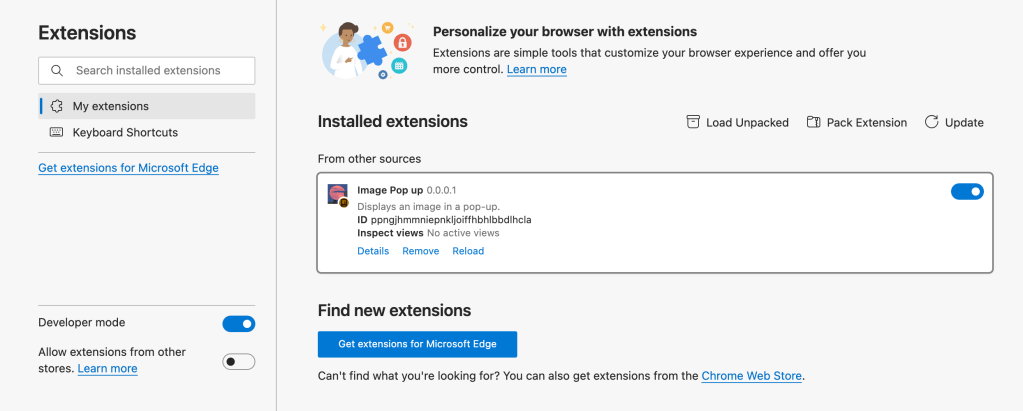
5. Install and test the extension locally
Reference is this;
Sideload an extension to install and test it locally
- Go to Extensions menu in Edge browser.
- Select Manage Extensions menu.
- Enable the Developer Mode.
- Click on the Load Unpacked button.
- Select the “ProjectFolder” that contains the manifest.json and other files.
- Click Select button.
- Go to Extensions menu again, and then you can see your own Extension!!!


Leave a comment