I learned how to create the simplest Edge Extension with following the tutorial. It doesn’t have JavaScript file to do something.
Tutorial part 1: Display an image in a pop-up
In this post, I will create the extension with a JavaScript.
I will follow the tutorial below. Through this tutorial, I understand the basic concept of injecting a content script with using JavaScript.
Tutorial part 2: Use JavaScript to insert an image in the webpage
What the extension does
Basic behaviors of this extension are;
- Show popup dialog when you click on the extension icon.
- Display a NASA picture of the day image in a current opened web page in the browser tab when you click on the “Display” button located in the popup dialog.
- Remove the NASA image when you click on the image.
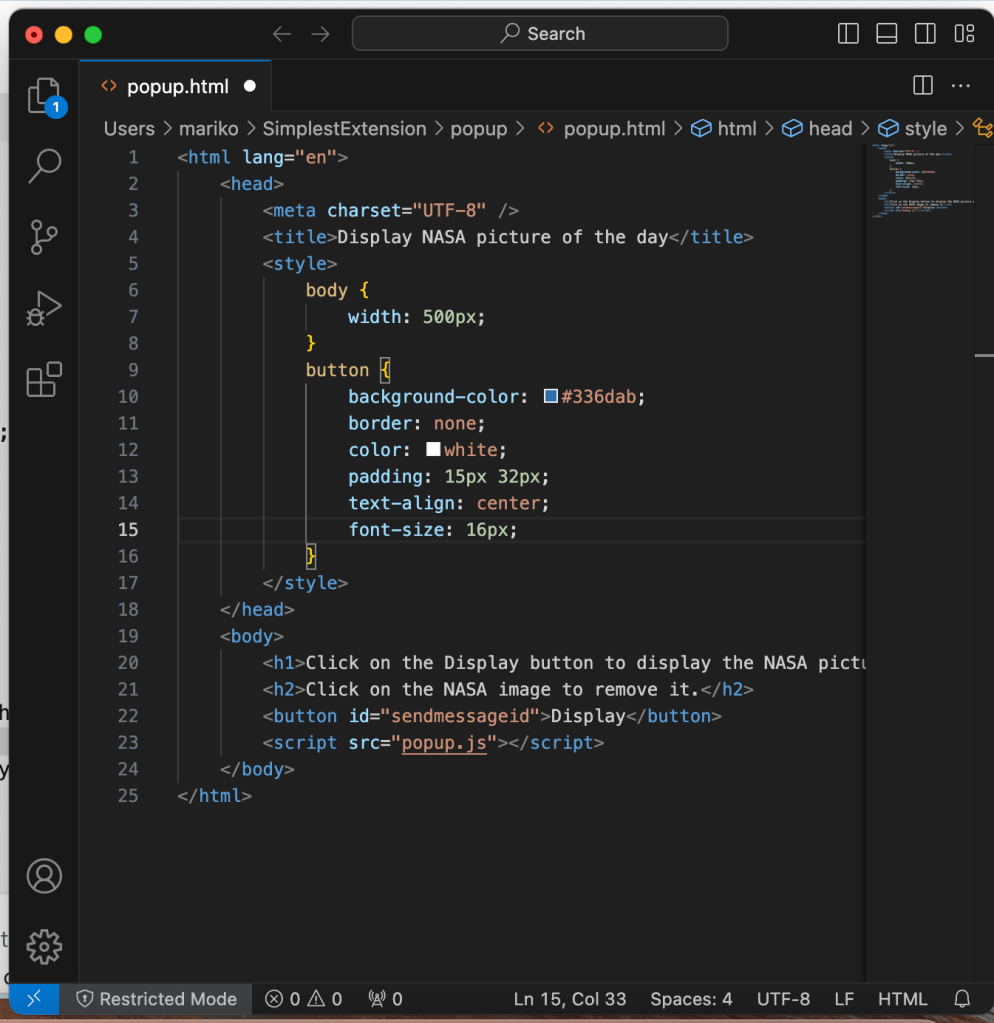
1. Create the popup.html
First of all, let’s create the popup.html to show the popup dialog for the behavior 1.
<html lang="en">
    <head>
        <meta charset="UTF-8" />
        <title>Display NASA picture of the day</title>
        <style>
            body {
                width: 500px;
            }
            button {
                background-color: #336dab;
                border: none;
                color: white;
                padding: 15px 32px;
                text-align: center;
                font-size: 16px;
            }
        </style>
    </head>
    <body>
        <h1>Click on the Display button to display the NASA picture of the day</h1>
        <h2>Click on the NASA image to remove it.</h2>
        <button id="sendmessageid">Display</button>
        <script src="popup.js"></script>
    </body>
</html>
I’m highly recommend installing Visual Studio Code to develop the HTML. With the “HTML CSS Support” extension, you can get useful suggestions in the editor for easy development.
Visual Studio Code Installation
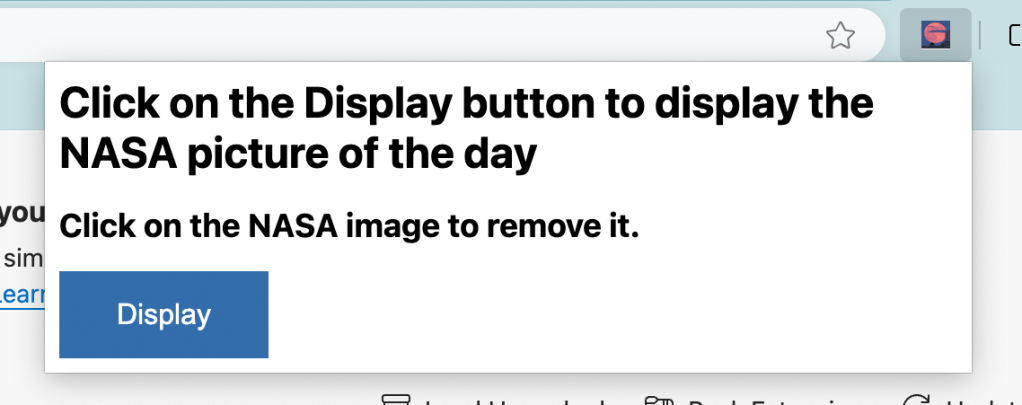
The popup dialog looks like this.
2. Create JavaScript file (popup.js)
Second, to display the NASA picture at the top of the current active web page, let’s add a button click event with using JavaScript code.
The code below is just a copy of the Tutorial part2.
Tutorial part 2: Use JavaScript to insert an image in the webpage
const sendMessageId = document.getElementById("sendmessageid");
if (sendMessageId) {
    sendMessageId.onclick = function() {
        chrome.tabs.query({ active: true, currentWindow: true }, function(tabs) {
            chrome.tabs.sendMessage(
                tabs[0].id,
                {
                    url: chrome.runtime.getURL("images/stars.jpeg"),
                    imageDivId: `${guidGenerator()}`,
                    tabId: tabs[0].id
                },
                function(response) {
                    window.close();
                }
            );
            function guidGenerator() {
                const S4 = function () {
                    return (((1 + Math.random()) * 0x10000) | 0).toString(16).substring(1);
                };
                return (S4() + S4() + "-" + S4() + "-" + S4() + "-" + S4() + "-" + S4() + S4() + S4());
            }
        });
    };
}
Let’s break down to understand what this code does.
document.getElementById(): JavaScript function that is used to access an HTML element based on its id attribute.
sendMessageId.onclick = function() {}: Assigns an event handler to the onclick event of the sendMessageId(Display button).
chrome.tabs.query(): A part of the Chrome Extensions API and is used to retrieve information about browser tabs that match specified criteria.
{ active: true, currentWindow: true }: These are the query objects.
function(tabs) {}: Callback Function that is executed when the query results are ready. tabs is an array that contains the browser tabs match the query.
chrome.tabs.sendMessage(): A part of the Chrome Extensions API and is used to send a message from the script(popup.js) to a content script running in a specific tab.
Link to Chrome Extensions API
ChromeExtensions runtime.getURL
OK, see you next post!

Leave a comment